06 — Workflow Approvals
Every Form 3A declaration that is submitted passes through a configurable approval chain before it can be forwarded to MAS. The approval chain is defined by a Workflow Template — a sequence of up to 6 approvers, each of whom must act before the next is notified. This section explains how representatives track their submission and how approvers take action.
Overview
When a representative submits a Form 3A, the system creates a Workflow Instance for that declaration based on the active Workflow Template for their organisation. The instance tracks: - Which approvers are in the chain (up to 6 sequential steps). - Which step is currently active. - The action taken at each completed step (approved, sent back, rejected).
Approvers act one at a time in sequence. Step 2 does not activate until Step 1 is complete.
Representative Experience
Finding Your Declaration
- Navigate to Dashboard using the sidebar.
- Your declarations are organized in tabs: Drafts, Revision Requested, Pending Internal Approval, and Completed. Status badges indicate where each declaration is in its journey.
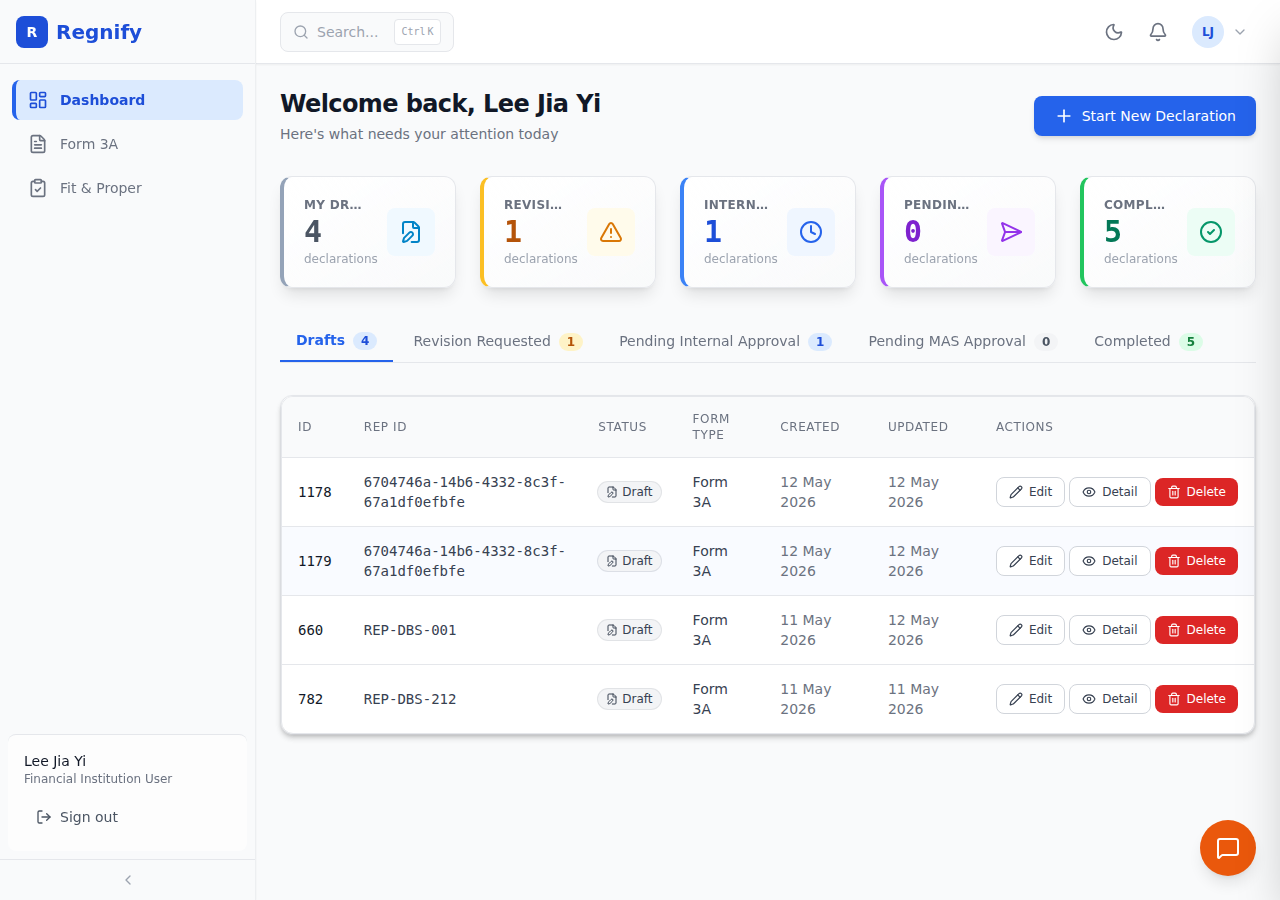 The declarations list showing status tabs and per-row status badges.
Tracking Workflow Progress
- Click any declaration in the Dashboard list.
- The Declaration Detail page opens at
/declarations/{id}. - The Workflow Progress section shows the WorkflowStepper component — a visual sequence of approval steps.
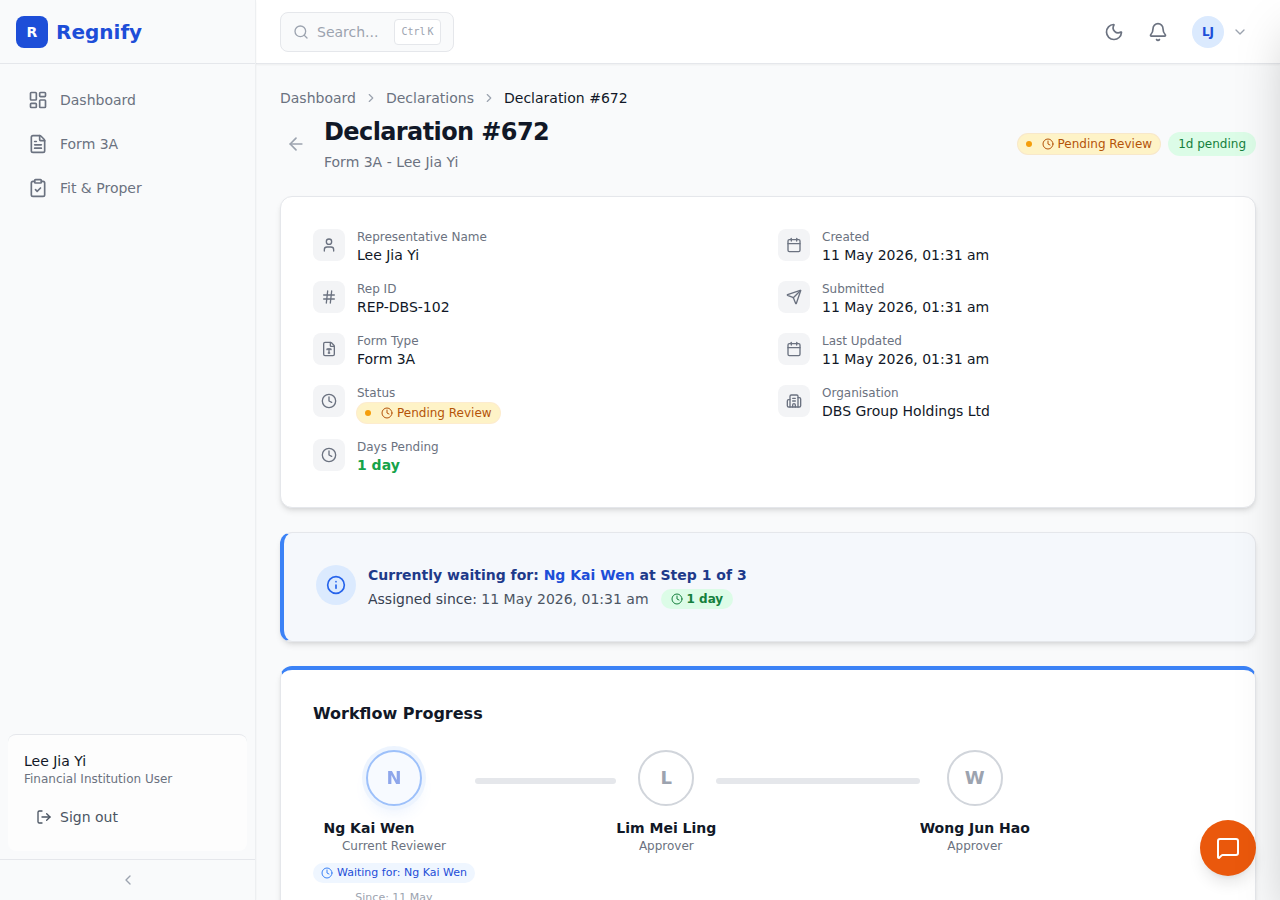 The workflow stepper showing three steps: the first approved, the second currently active, the third pending.
The stepper shows: - Each approver's name and their role in the sequence. - The step's current state (see color codes below). - For the active step: a "Waiting for: [Name]" label, the date assigned, and an idle-days counter. - For completed steps: the date they acted. - Any comment left by a completed step's approver (truncated, full text visible on hover).
Understanding the "Waiting For" Card
When your declaration is in PENDING_REVIEW, a blue information card on the Declaration Detail page shows:
"Currently waiting for: [Approver Name] at Step X of Y"
It also shows how long the declaration has been with that approver: - Green (≤ 3 days) — within normal turnaround. - Amber (4–7 days) — approaching SLA. - Red (> 7 days) — overdue.
What "Changes Requested" Means
If an approver clicks Send Back (Request Changes), your declaration's status changes to REVISION_REQUESTED and you receive a notification.
On the Declaration Detail page, an orange Changes Requested card shows: - Who sent it back (approver name and step number). - The date it was returned. - The reason provided.
To resubmit:
1. Click Edit on the Declaration Detail page. Form 3A reopens in edit mode with your previous data intact.
2. Make the necessary changes as described in the reason.
3. Upload any additional documents if required.
4. Scroll to Section 14 — Review & Submit and click Submit. The declaration returns to PENDING_REVIEW status.
Approver Experience
Approvers are users assigned the HR_ADMIN, COMP, or ORG_ADMIN role who have been designated as approvers in one or more Workflow Template steps.
Finding Declarations to Approve
- Navigate to Dashboard using the sidebar.
- As an approver, the Dashboard shows declarations in the approval queue. Declarations waiting for your action appear with the current step highlighted.
- Alternatively, navigate directly to a specific approval using the link
/workflow/{declarationId}.
Prerequisites: You can only approve a declaration if you are the designated approver for the currently active step. If it is not your step, the page shows a status message: "You are not the current approver for this declaration. Please wait for your turn."
The Workflow Approval Page
Navigate to /workflow/{declarationId} to open the dedicated Workflow Approval page for a declaration.
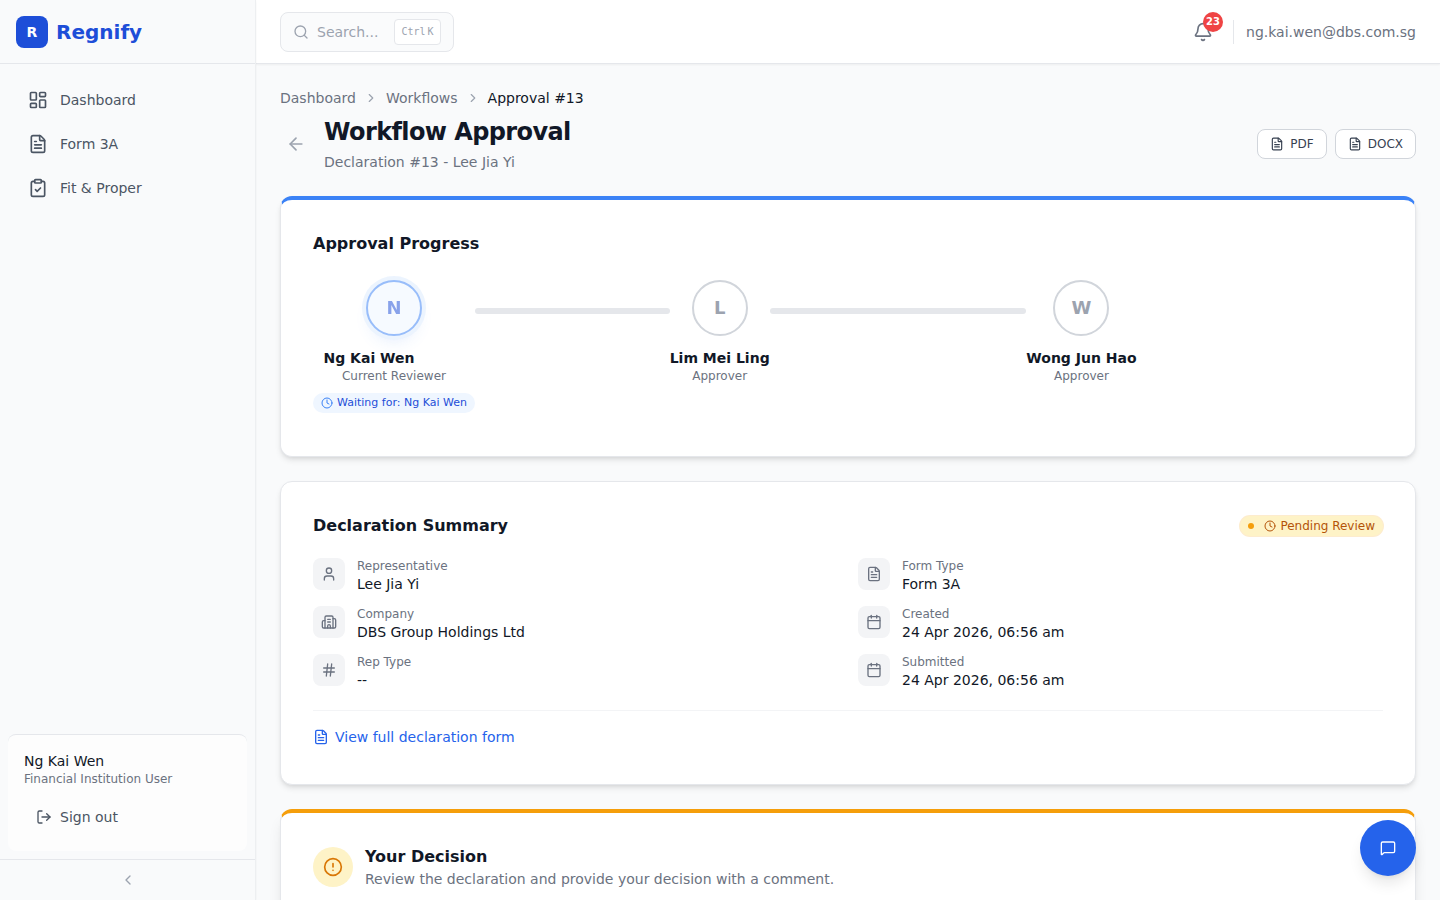 The Workflow Approval page showing the stepper, declaration summary, past comments, and the action panel.
The page contains:
Approval Progress (top): The WorkflowStepper showing all steps and their current states.
Declaration Summary: Key metadata — representative name, company, rep type, form type, created date, submitted date, and current status badge. A View full declaration form link opens Form 3A in view-only mode so the approver can review all entered data.
Approval Comments: A chronological log of all comments left by previous approvers, color-coded by action type (green for approvals, orange for send-backs, red for rejections).
Your Decision panel (only visible to the current approver): The action section where the approver provides their decision.
Completing Sections 11–13 (HR_ADMIN Approver-Edit Mode)
When an HR_ADMIN approver opens Form 3A via the View full declaration form link, Sections 1–10 are read-only but Sections 11–13 become editable. These sections contain the Fit & Proper Certification, Required Declarations, and Confirmation that the approver must complete as part of the review.
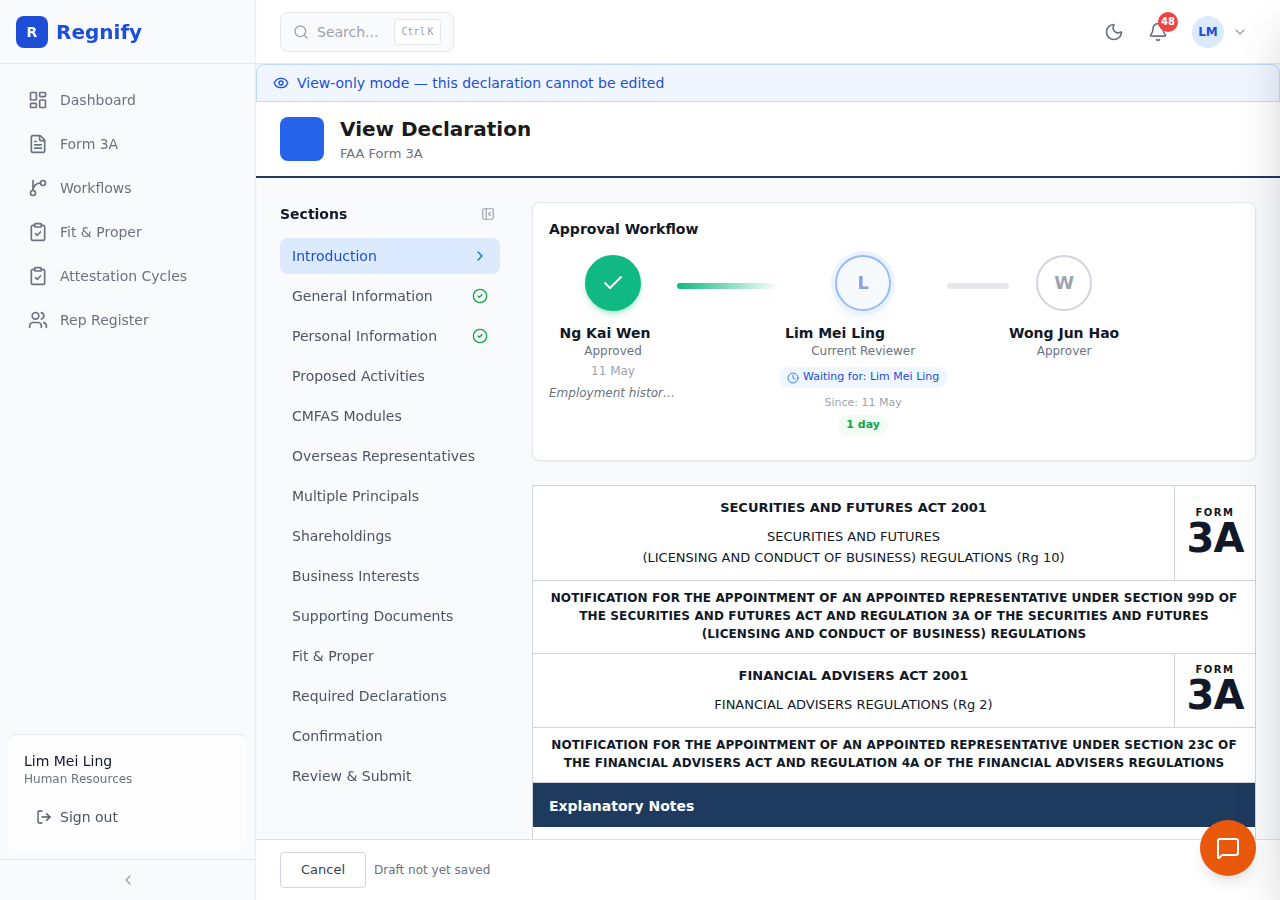 Form 3A opened by an HR_ADMIN approver: Sections 1–10 are read-only; Sections 11–13 are active and editable.
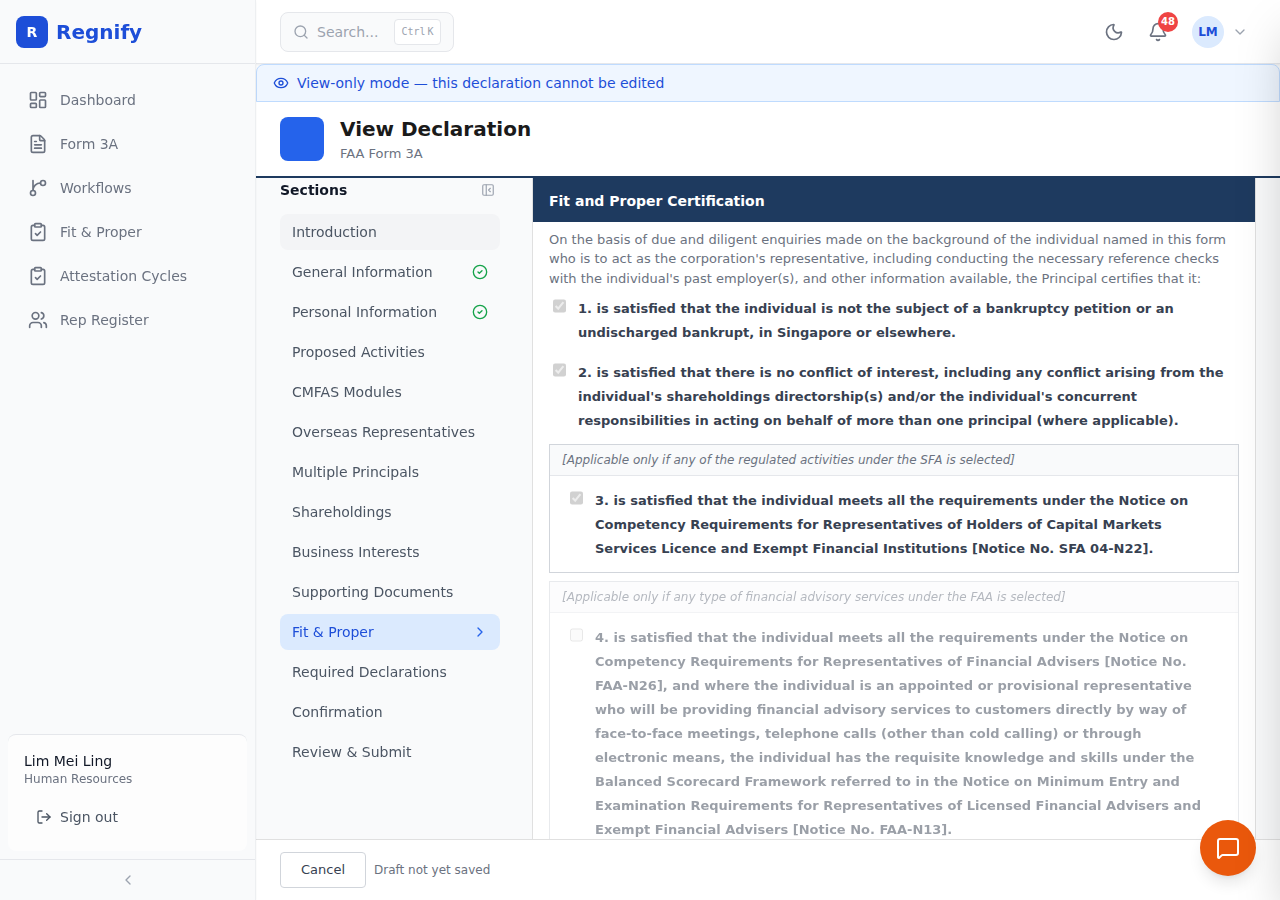 Section 11 editable by the HR_ADMIN approver: up to 8 Fit & Proper certification checkboxes, with Items 3 and 4 conditional on the activities declared in Section 4.
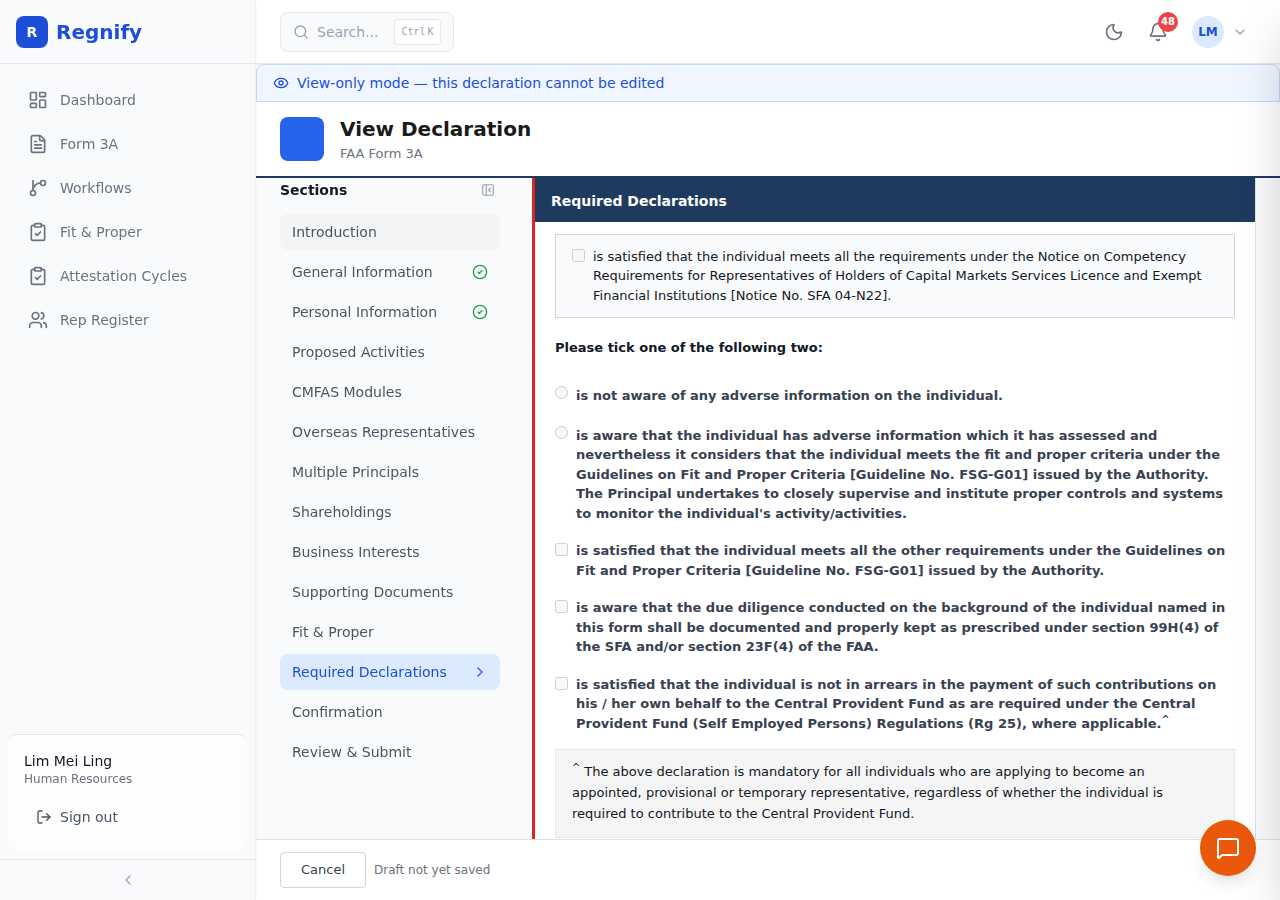 Section 12: statutory declarations by a Director or CEO of the Principal, editable by the HR_ADMIN approver.
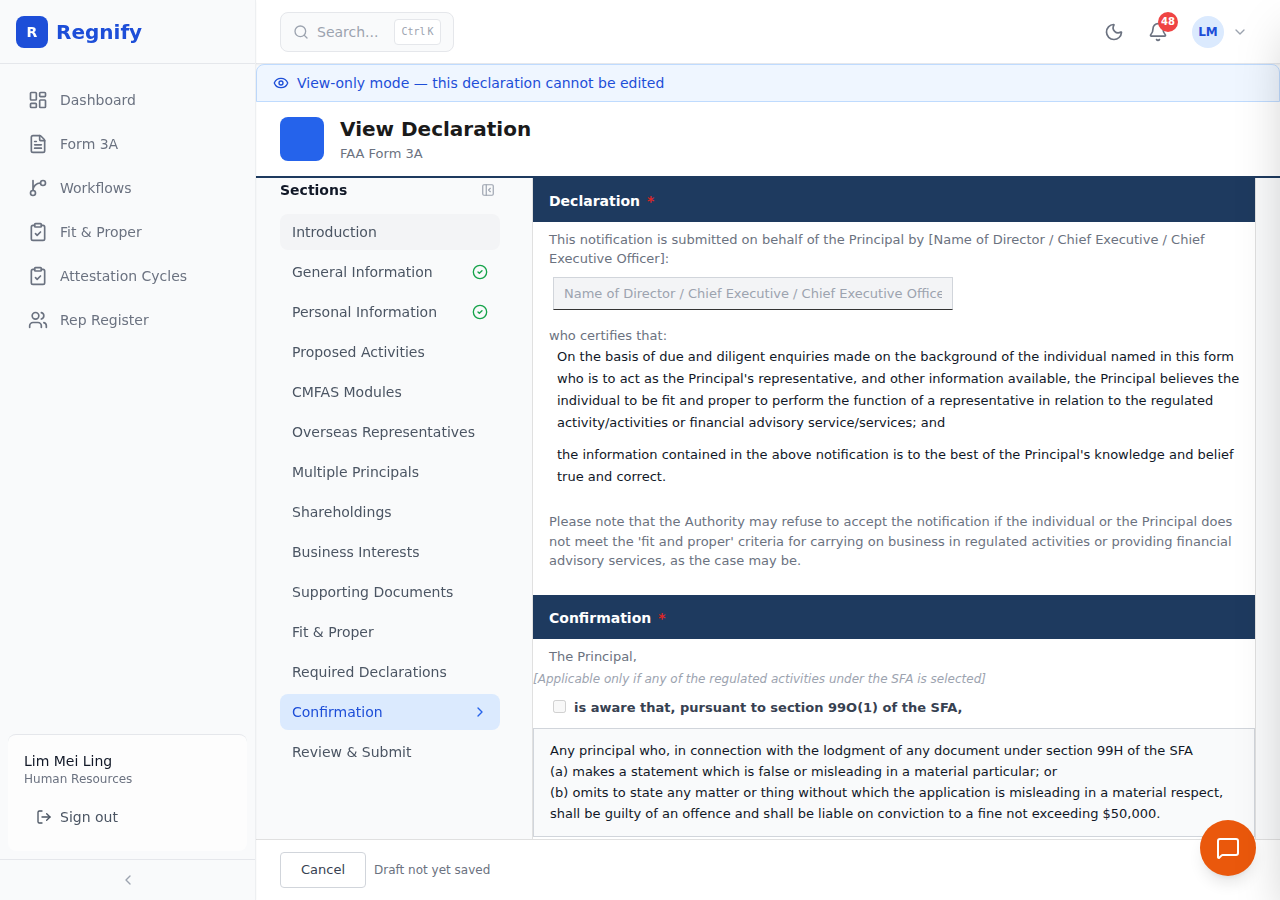 Section 13: final lodgment confirmation, editable by the HR_ADMIN approver before the declaration can be forwarded.
Taking Action
Prerequisites: You must be the approver designated for the currently active step. The declaration must be in PENDING_REVIEW status.
All three actions (Approve, Request Changes, Reject) require a comment. The comment is mandatory and recorded in the approval timeline.
Approve
- In the Your Decision panel, enter your review comment in the Comment field (required).
- Click Approve.
- A confirmation modal appears showing the declaration details and your comment.
- Click Confirm Approval.
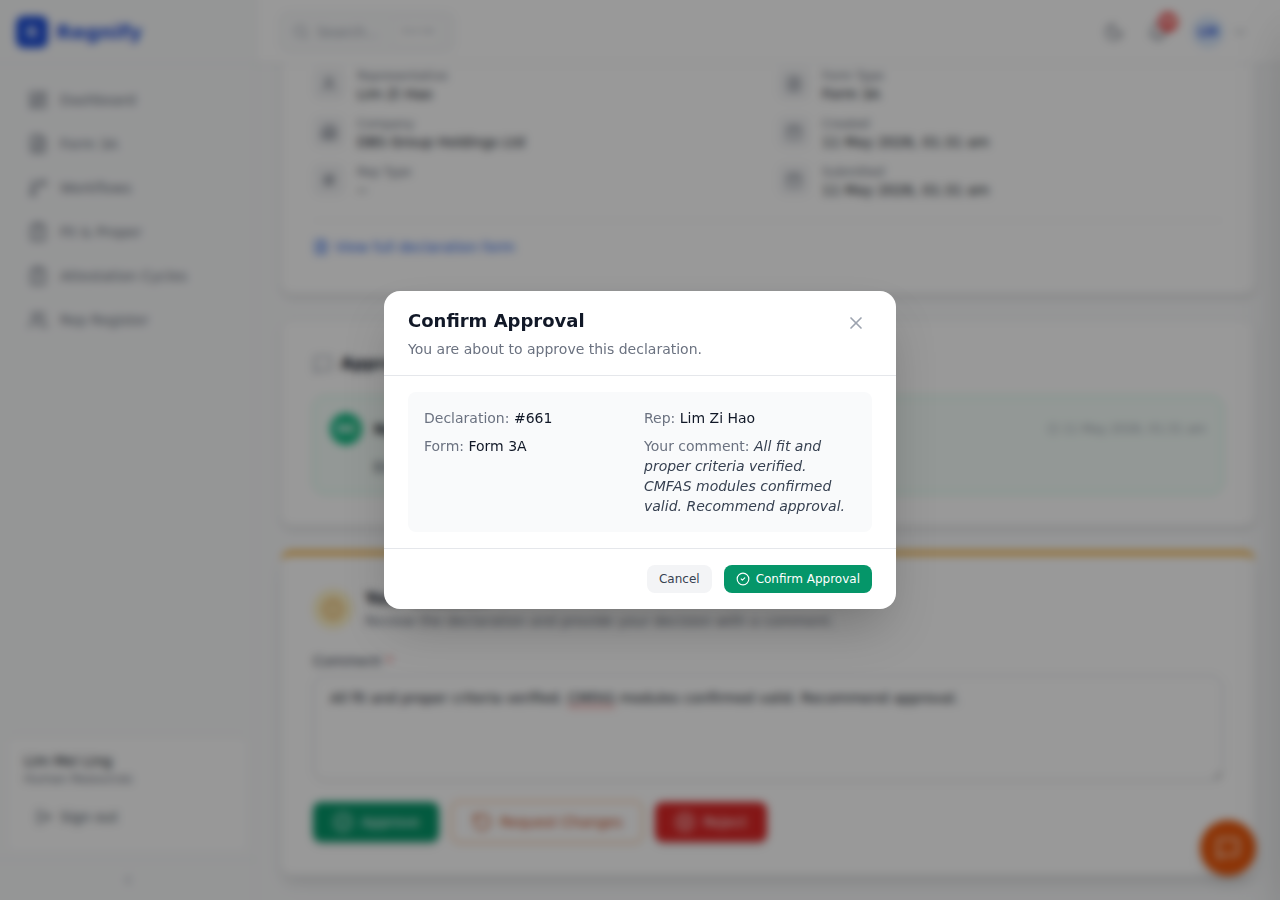 The approval confirmation modal showing declaration details and the approver's comment.
Result: If this is not the final step, the next approver is notified. If this is the final step, the declaration status changes to APPROVED.
Request Changes (Send Back)
Use this action when the declaration requires corrections but is not fundamentally problematic.
- Click Request Changes.
- A Request Changes modal appears.
- Enter a description of the required changes in the What changes are needed? field (required).
- Click Send Back.
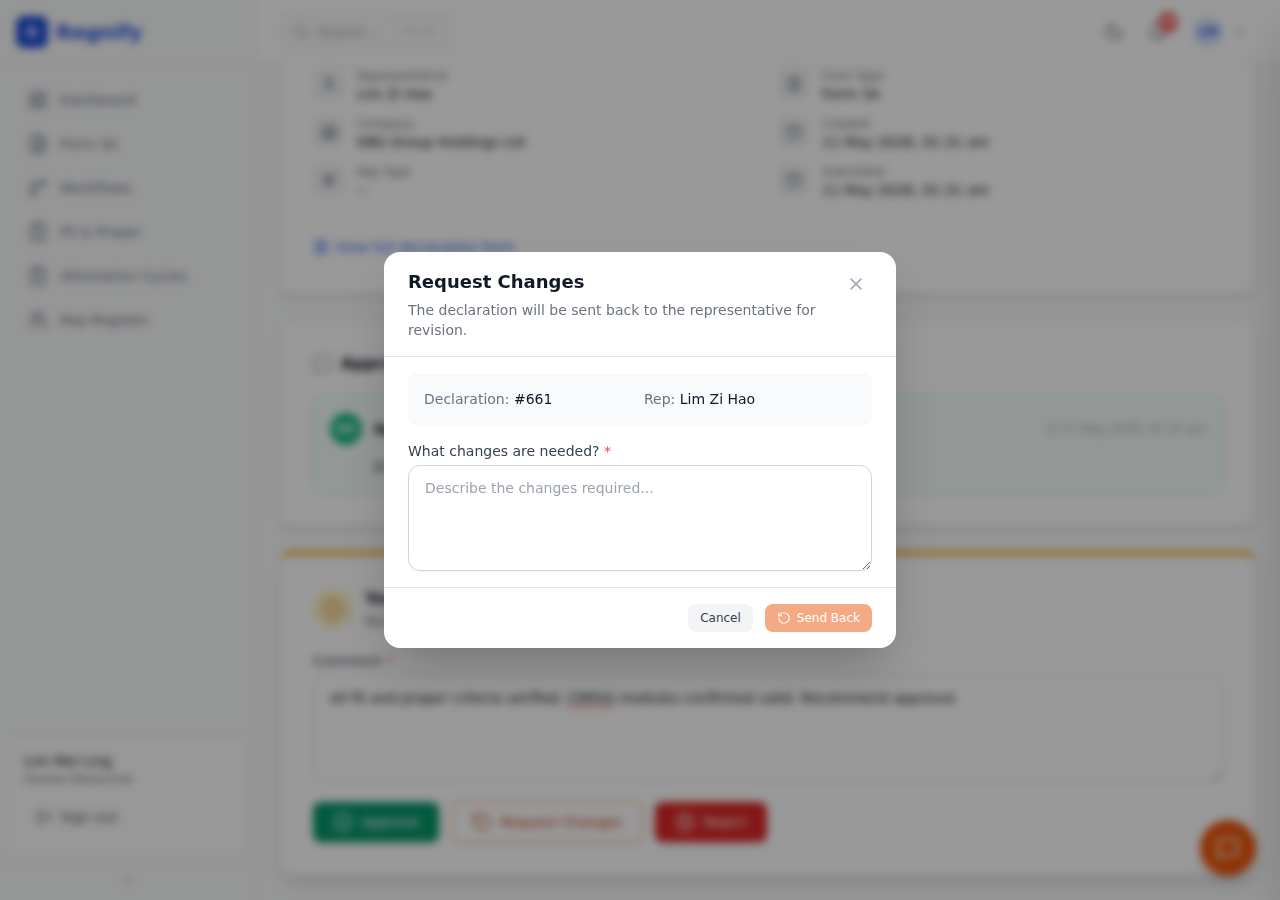 The Request Changes modal showing the declaration summary and the required-changes field.
Result: The declaration status changes to REVISION_REQUESTED. The representative is notified and can see your reason on the Declaration Detail page. The workflow resets to the step at which the send-back occurred.
Reject
Use this action when the declaration cannot be approved and a new submission is required.
- In the Your Decision panel, enter your comment explaining the rejection reason.
- Click Reject.
- A confirmation modal appears.
- Click Confirm Rejection.
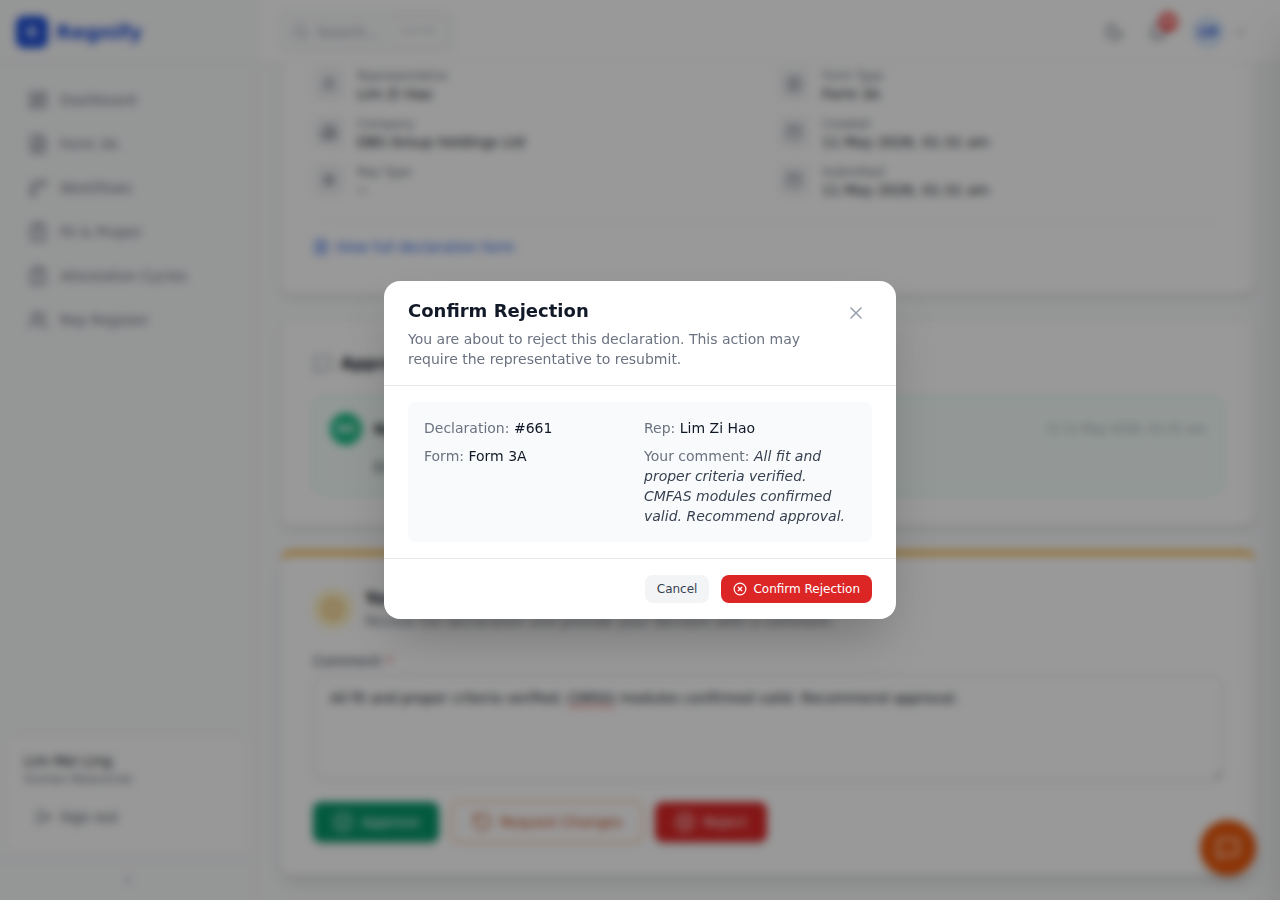 The rejection confirmation modal. The representative will need to start a new declaration.
Result: The declaration status changes to REJECTED. This is a terminal state — the representative must create a new Form 3A declaration to restart the process.
Important: Rejection is permanent. If you intend to allow the representative to make corrections and resubmit, use Request Changes instead of Reject.
Workflow Stepper Color Codes
The WorkflowStepper component uses colors to communicate the state of each step at a glance:
| Step State | Circle Color | Description |
|---|---|---|
| Completed (Approved) | Green, filled, checkmark icon | This approver has approved |
| Current (Active) | Blue ring, pulsing animation | Currently waiting for this approver |
| Rejected | Red, X icon | This step ended in rejection |
| Sent Back | Orange | This step sent the declaration back for revision |
| Pending (Future) | Grey, unfilled | Not yet reached |
Connector lines between steps change color to match the preceding step's outcome: - Green gradient: previous step approved. - Red gradient: previous step rejected. - Orange gradient: previous step sent back. - Grey: previous step not yet acted on.
For the active step, an idle-days indicator shows how long the declaration has been awaiting that approver's action (green ≤ 3 days, amber 4–7 days, red > 7 days).
Multi-Step Workflows
Workflow templates support up to 6 sequential approvers. Each step must complete before the next begins:
Step 1: HR Admin  →  Step 2: Compliance  →  Step 3: Org Admin
   [Approved]           [Current]              [Pending]
- Only the approver at the current step can act.
- All previous steps must be
Approvedbefore the current step becomes active. - If any step is rejected, the entire workflow terminates.
- If any step sends the declaration back, the workflow pauses and the representative must resubmit. Upon resubmission, approval restarts from the step that sent it back.
Approval Actions — Summary Reference
| Action | Button | Required? | Comment | Result |
|---|---|---|---|---|
| Approve | Green — Approve | Current approver only | Required | Advances to next step or sets APPROVED |
| Request Changes | Orange — Request Changes | Current approver only | Required | Sets REVISION_REQUESTED; rep must edit and resubmit |
| Reject | Red — Reject | Current approver only | Required | Sets REJECTED; terminal — no resubmission |
Related: Form 3A Wizard | Declaration Lifecycle | MAS Console